
The final step in properly installing additional lighting is securing all newly added wires, plugs, and various connections in the installation. Unfortunately, this step is often skipped, which can result in plugs clattering on plastic, pulled out or damaged plugs, or even bigger issues by leaving loose cables in the driver's leg area near the pedal. Therefore, it is worth spending some extra time on solid securing to ensure the installation's safety and aesthetic quality.
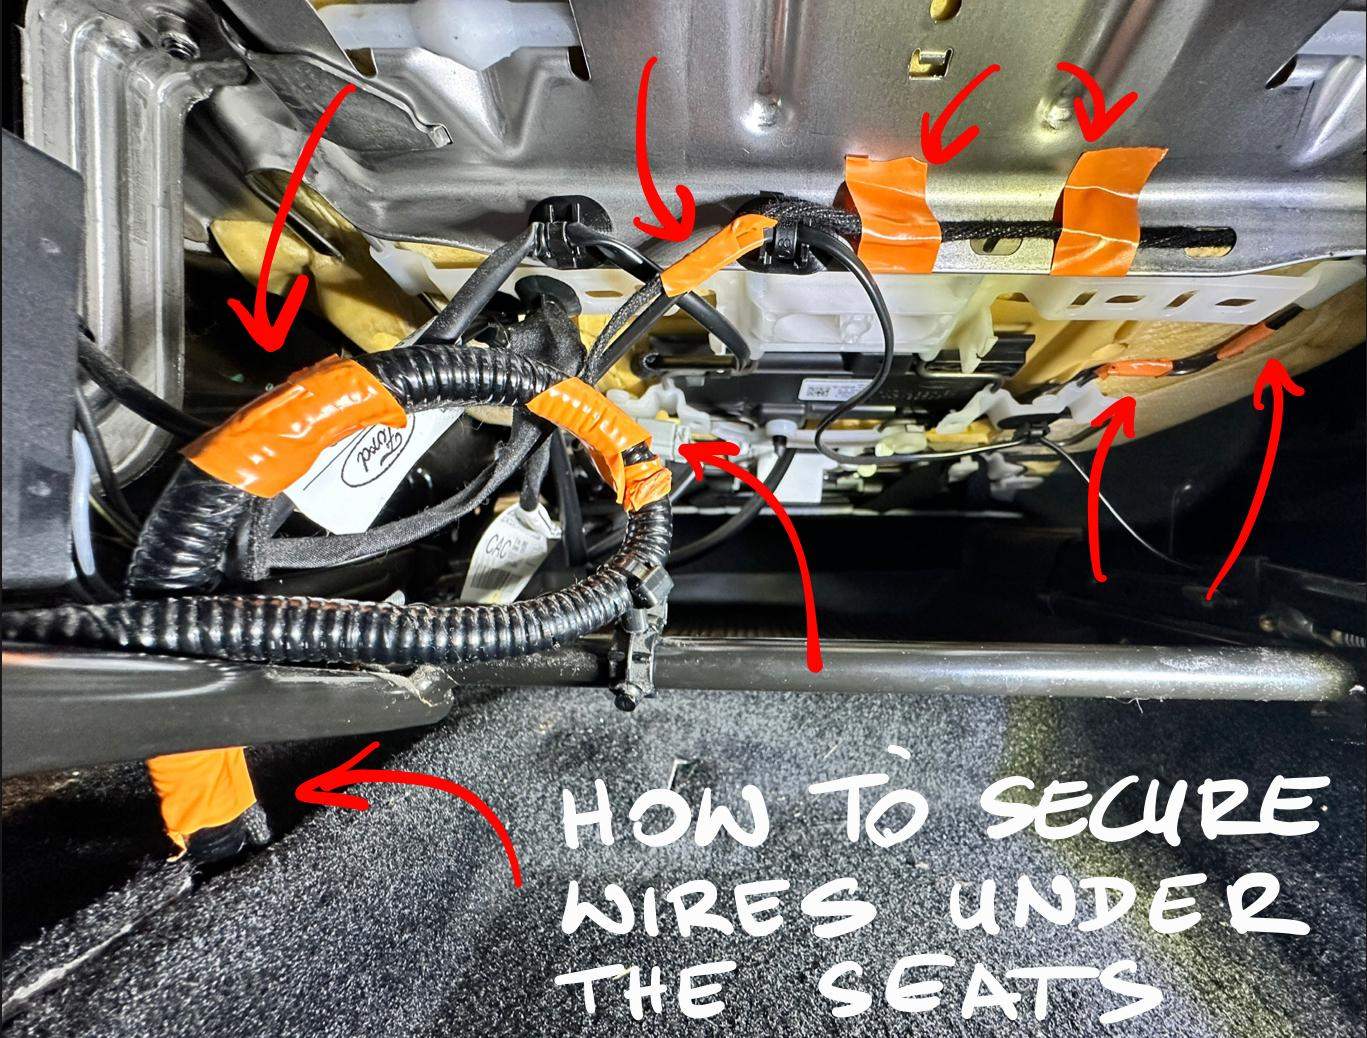
Using the footwell lighting installation in the Ford Fiesta MK8 as an example, I will illustrate how to secure wires in different areas. I used orange tape to highlight key points requiring special attention to better visualize this process.
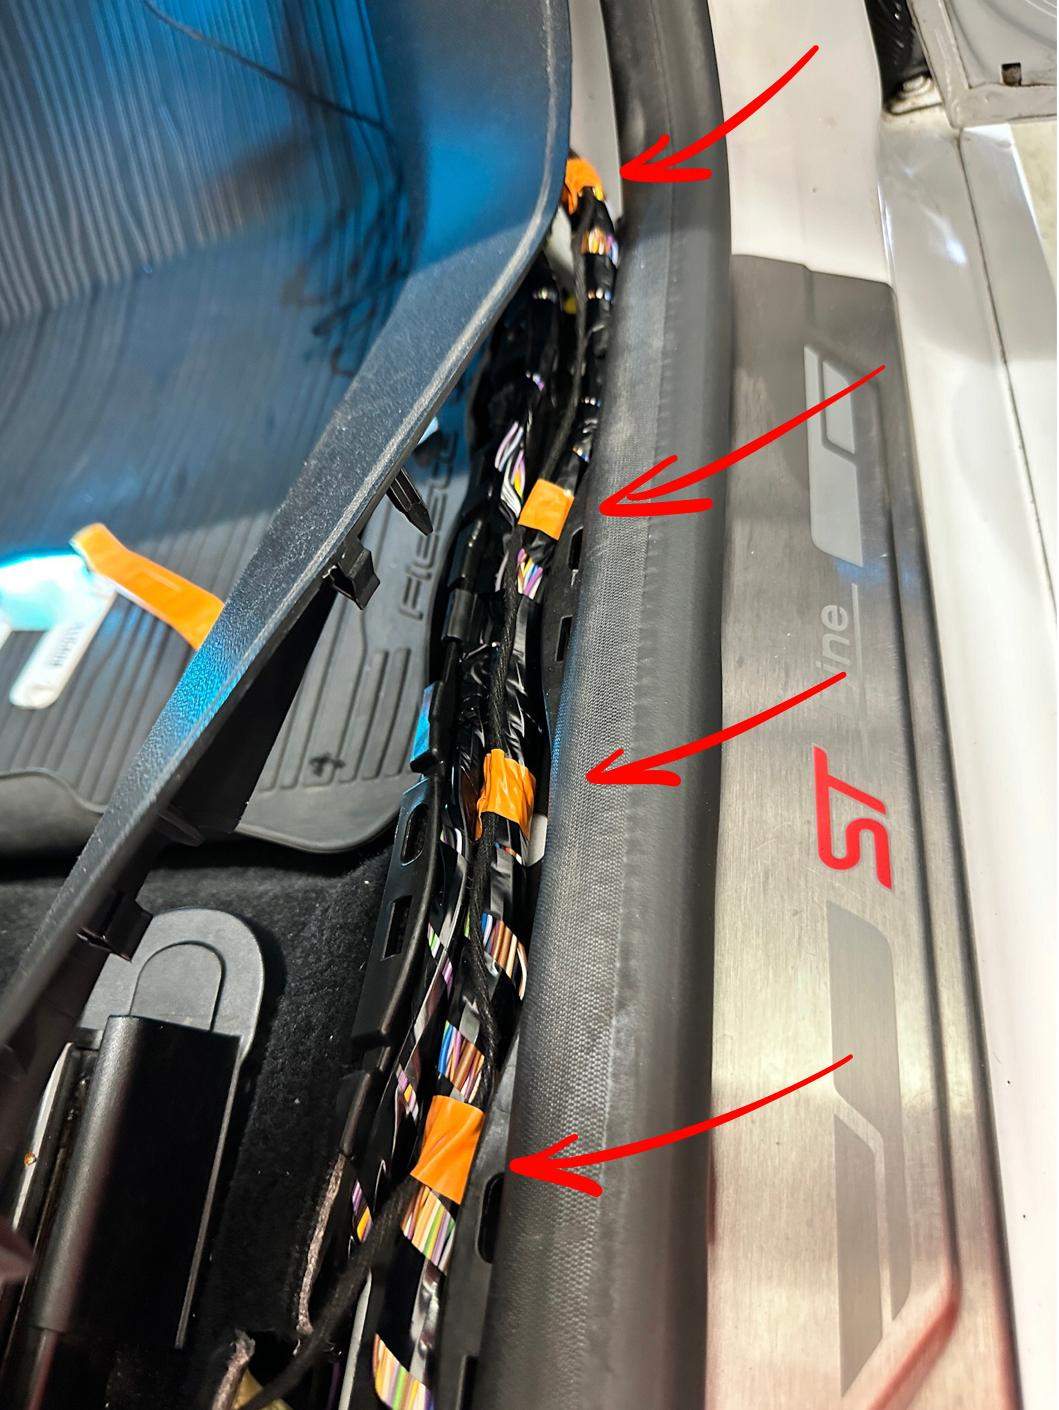
Our wiring harnesses were secured with TESA fabric tape, paying special attention to the thickness of the final harness wires. This allows for easy and aesthetic routing of the wires parallel to existing harnesses.
The area under the seats is particularly vulnerable to damage because various items are often transported or stored there. Improperly secured wires can easily be accidentally yanked out. Therefore, it is recommended to route and clip the wires using existing harnesses, hooks, seat frames, etc., ensuring a clean and professional finish.
It is important to utilize available elements in the car, such as tunnels, plastic covers, or steel components. We can secure the harness with tape or zip ties by using existing tunnels, plastic parts, or steel elements.
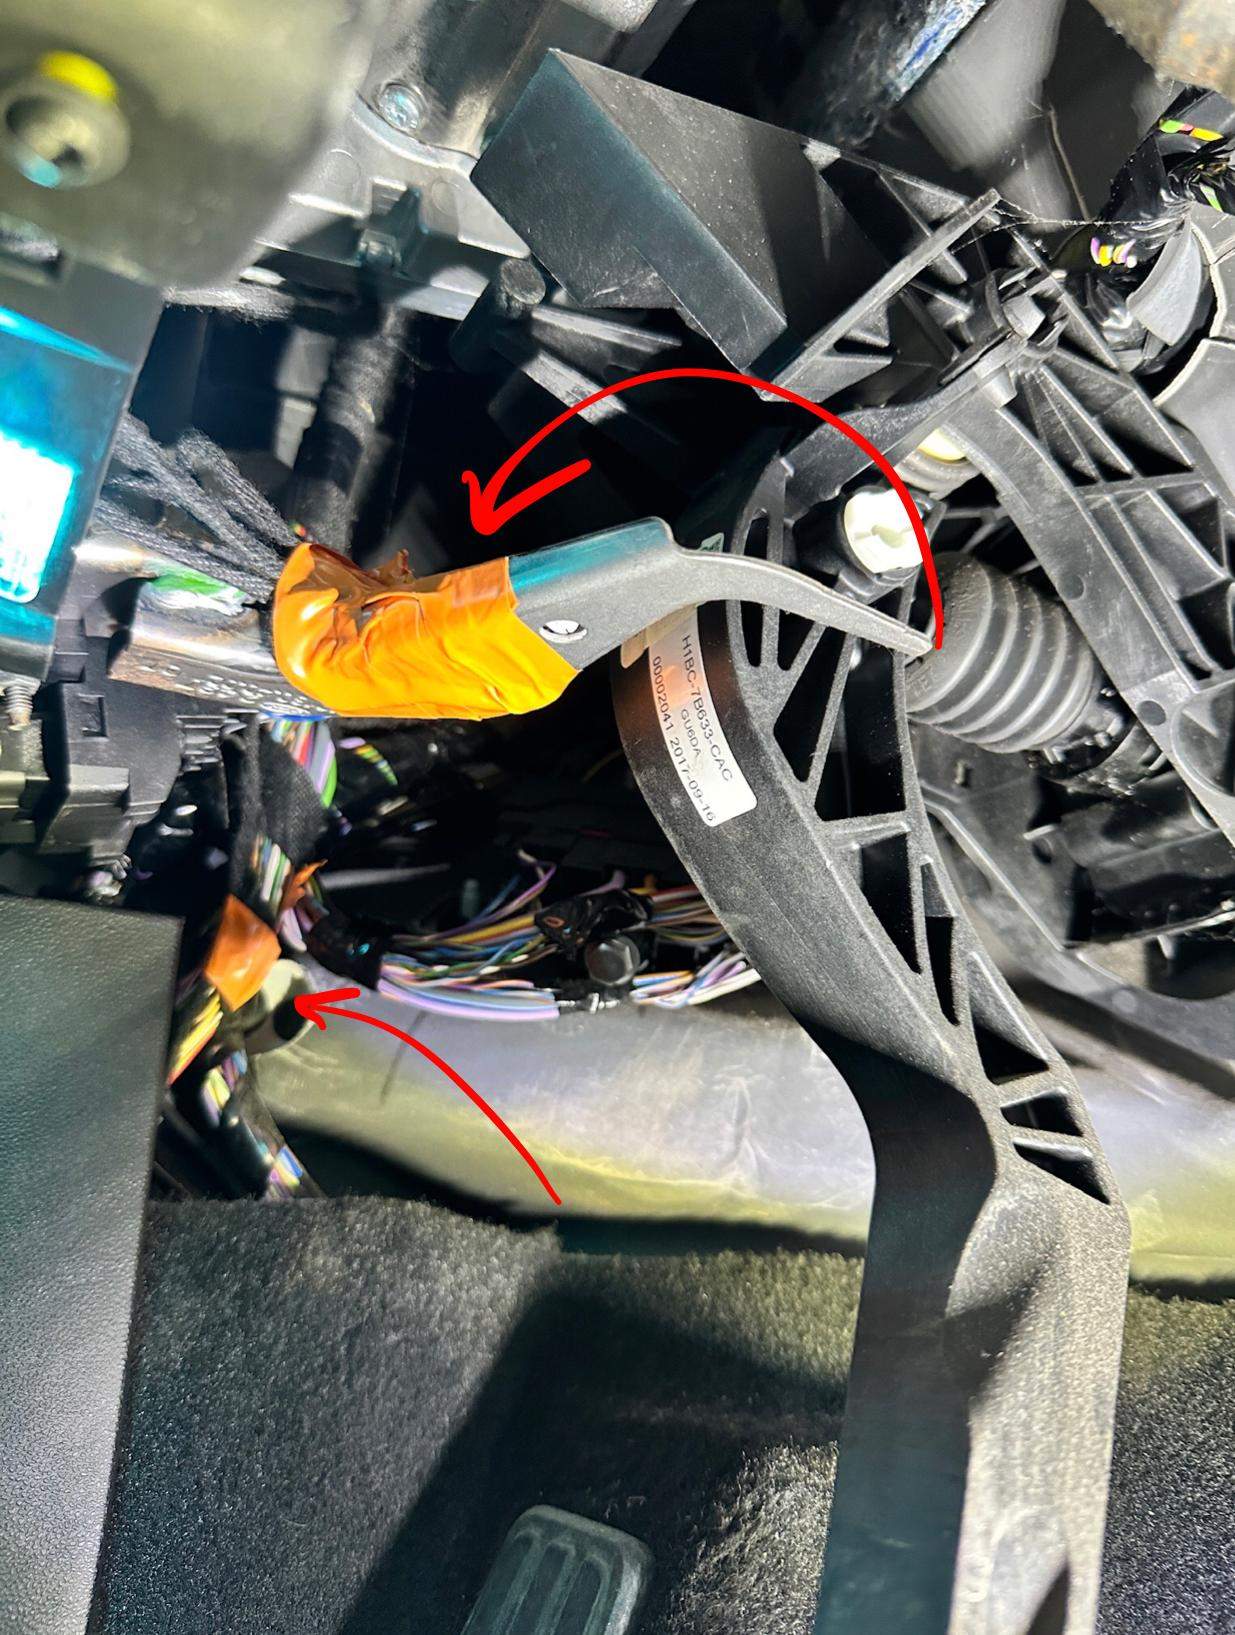
It is essential to remember that the vehicle is exposed to extreme weather conditions. Proper placement and securing of the cables help avoid unwanted noises while driving, such as loose plugs hitting other vehicle components. Be sure to firmly secure all wires using the available elements inside the car. The attached photo shows how we used a steel connector as a "shelf," where we adhered excess wire, leaving it in the door threshold.
I guarantee that taking these additional minutes and putting in a little precision during assembly will result not only in an aesthetically pleasing project but, above all, a stable and safe installation that will last for many years.